Linux on Mac using UTM
by James Armes (they/them)

I know that Macs are very popular in the engineering community, but I have always preferred some flavor of Linux for my local system. Throughout most of my career I’ve used either Kubuntu or Fedora KDE Spin (can you tell which desktop environment I like). I’ve played around with other distros in the past, but I’ve always found these two to be the most stable for my daily driver.
When I moved into civic tech, I had to dump Linux and move to macOS because it’s easier to manage for compliance purposes. It’s been an adjustment, and it’s not all bad. For the most part, I don’t run into any large hurdles that would impede my everyday work.
There are little things, though:
- Installing dependencies for certain gems or older Ruby versions
- Some commands work differently compared to Linux (a consequence of being BSD-based)
- No native docker
- OS version updates breaking software
- Delays in receiving security updates
- No separate highlight+middle-click clipboard (my most missed feature of KDE)
There more, but I think you get my point. And sure, I can deal with it, but why should I? What this all comes down to is, I miss running Linux. I’ve tried various methods in the past of replicating the experience with virtualization; including VirtualBox, Parallels Desktop, and QEMU. They all fell short either in performance or functionality, or most often both.
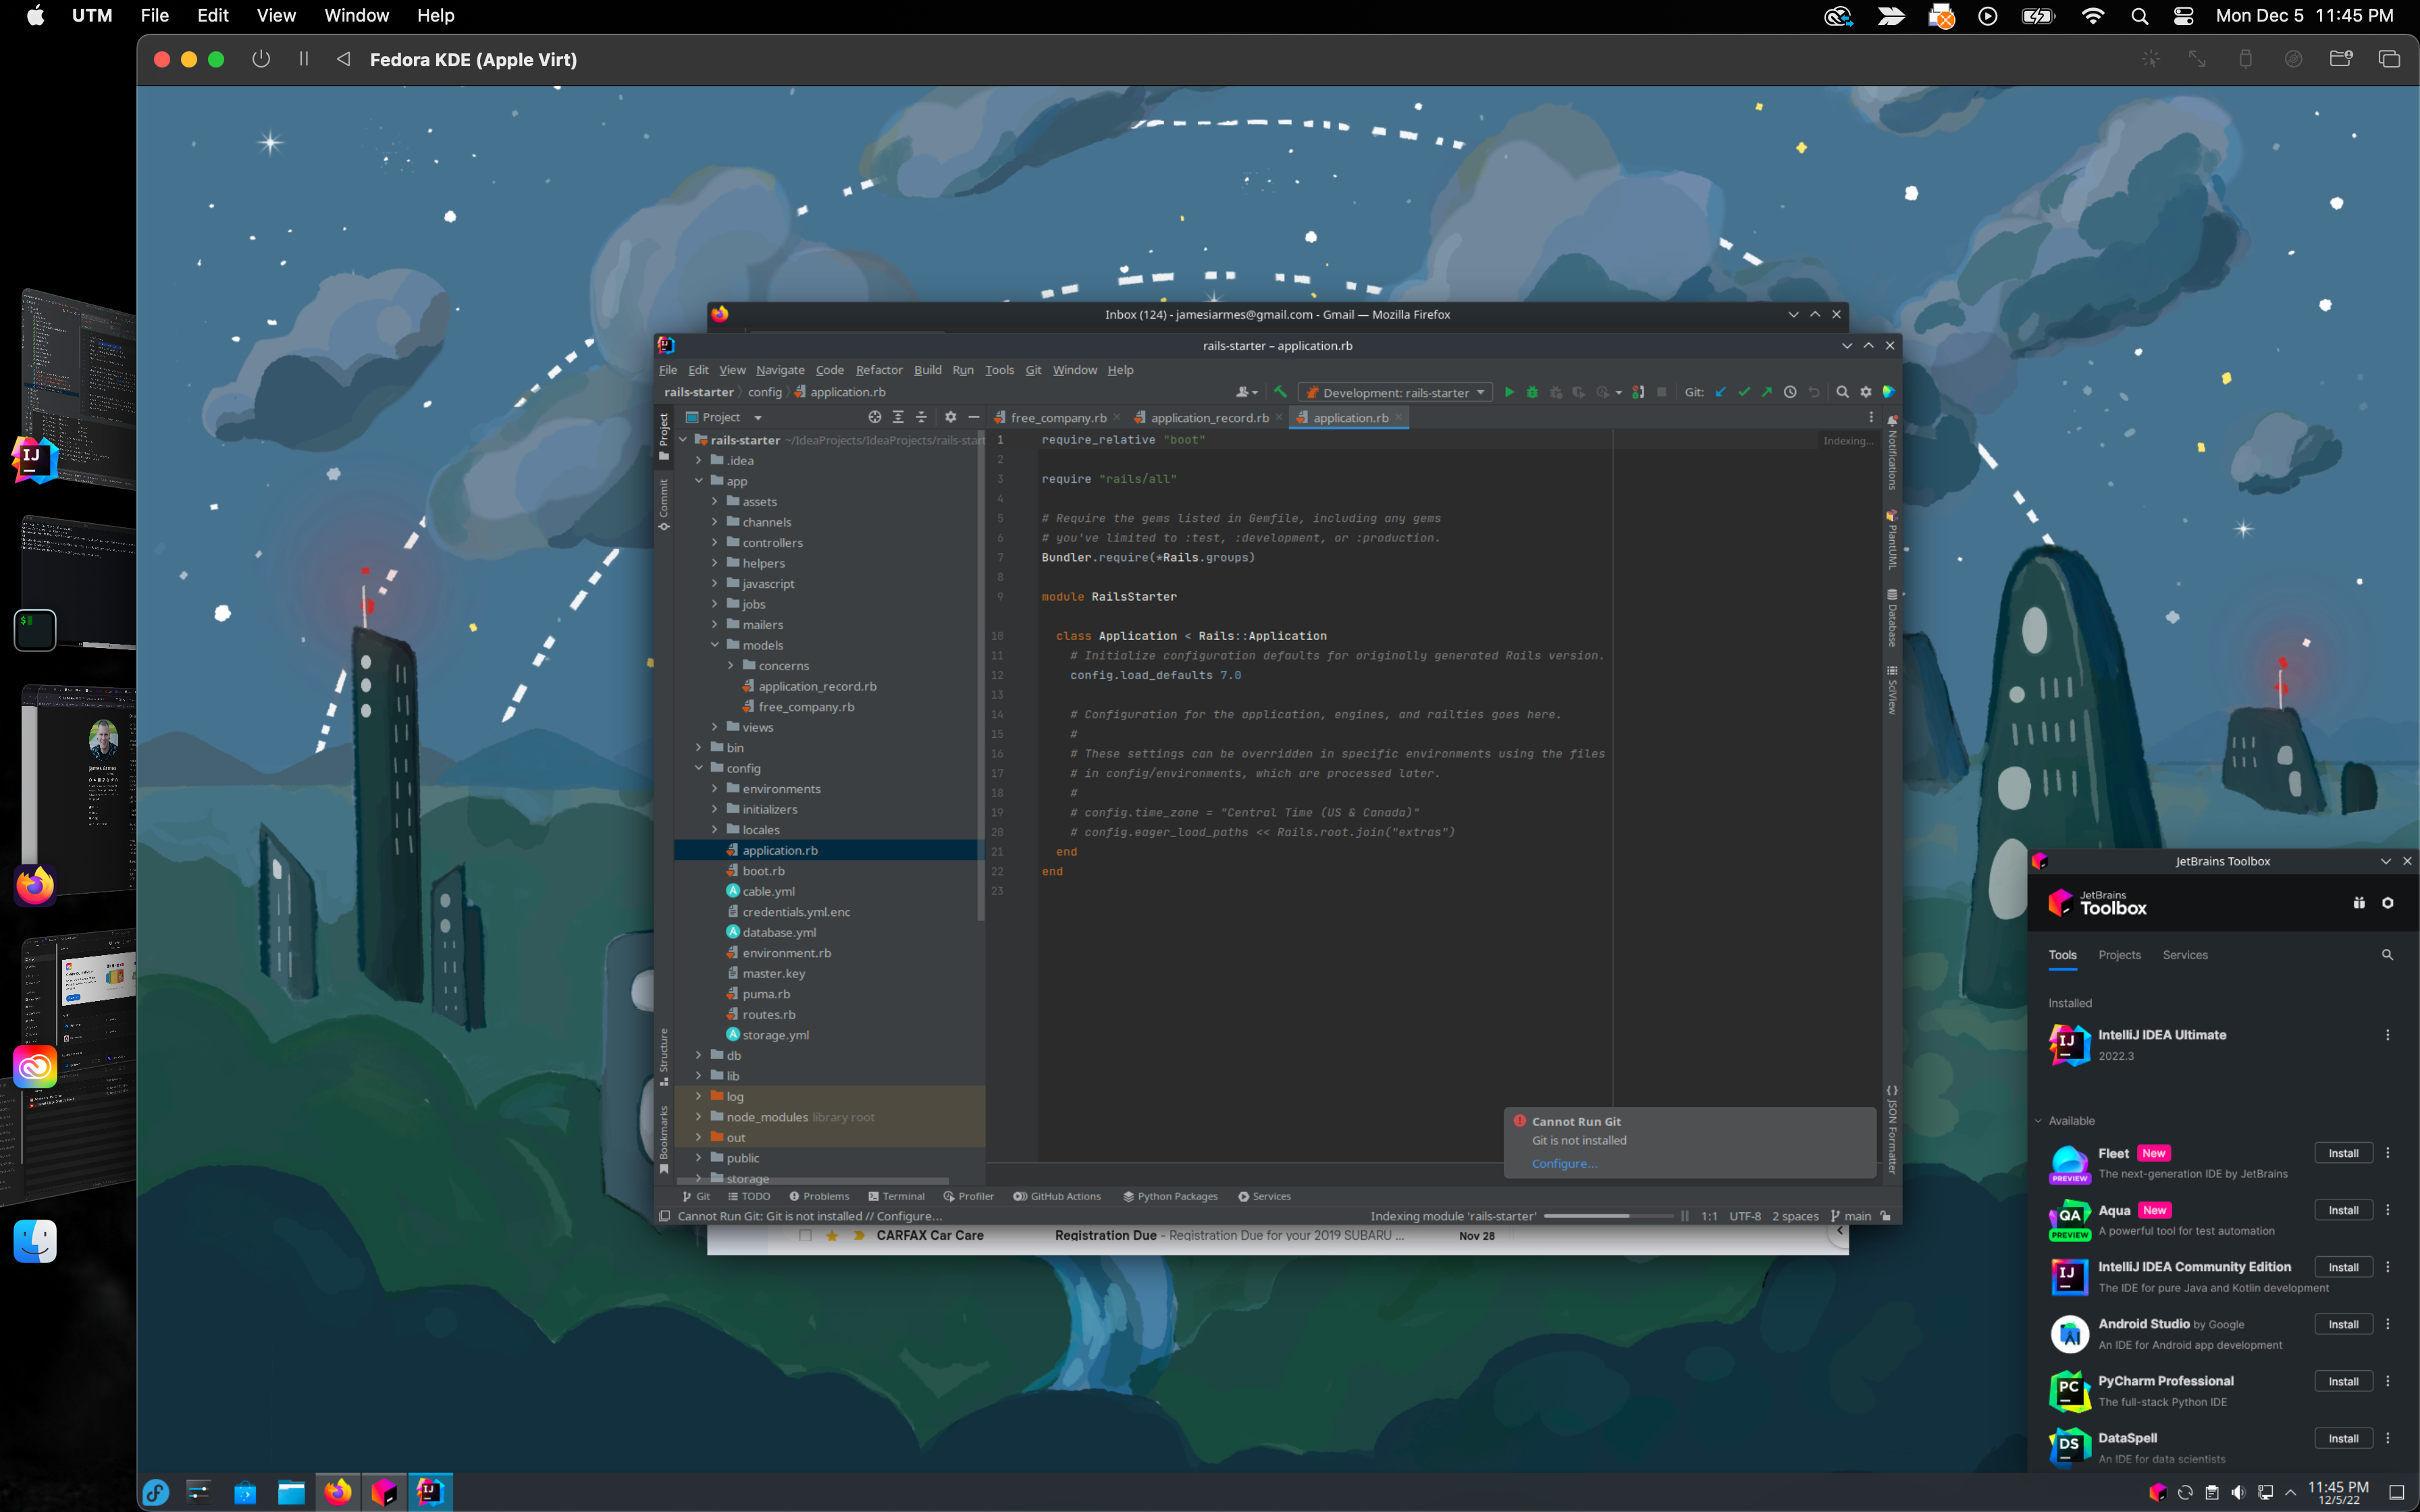
I recently ran into UTM, a system emulator and virtual machine system for macOS. It supports both Intel and Apple Silicon, though for my purposes I only need Intel, and Windows, Linux, and macOS guests. It sounded promising, so I set out to create a Fedora 37 KDE VM (virtual machine). I haven’t used it much yet, but wanted to capture my experience some of the issues I ran into in the event that others may find it valuable.
Installing UTM using homebrew
Before we begin, I want to share the specs for my personal Mac that I used to set this up:
- MacBook Pro 2019 16-Inch
- 2.6 GHz 6-Core Intel Core i7
- Intel UHD Graphics 630 1536 MB
- 16 GB 2667 MHz DDR4
- macOS 13.0.1
- Homebrew 3.6.13
I used Homebrew to install the latest version of UTM (4.0.9 currently). You can also download a DMG from the UTM website or install it from the App Store. The App Store version is an official release but does cost $9.99USD, which goes to fund development.
If you are using Homebrew, you can install UTM by running the following command in your terminal:
brew tap homebrew/cask
brew install utm --cask
You should now be able to run UTM from Spotlight.
QEMU or Apple Virtualization Framework
There are two ways to run virtual machines on Intel Macs: QEMU and AVF (Apple Virtualization Framework). I won’t be covering emulation or Apple Silicon here.
QEMU is an open source emulator that can be used to run a number of guest operating systems and architectures. It is not macOS specific and is available for multiple platforms.
AVF is a macOS-specific virtualization platform that allows macOS to run a variety of guest operating systems. It also supports hardware-assisted virtualization, which can make it faster and more efficient than QEMU. AVF also supports virtual networking and storage, allowing you to create more complex virtual networks.
UTM supports both of these options; however, the AVF option is listed as experimental. With this in mind, I initially started with QEMU. After taking the time to setup a basic environment, I ran into an issue with directory sharing which led me to try AVF. Your mileage may vary, but I found that AVF performed better and I did not run into the same sharing issue. Creating the virtual machine: Take one
Before we get into the details, I’d like to share the specs for the Virtual Machine I created:
- Linux operating system
- 8 GB memory (8192 MB)
- 64GB Storage
I used an ISO of Fedora 37 KDE Plasma Desktop and setup a directory share for my IdeaProjects directory. I left all other settings with their default values.
I mentioned in the previous section that I started by using QEMU. This is the default and requires no additional configuration.
I went through the normal install process and waited for it to complete. After installation, I had to shut the VM down to remove the virtual device for the ISO. I started the system and set out to set up a basic development environment:
- Install any package updates
- Install the Snap backend for Discovery
- Install the JetBrains Toolbox
- Install IntelliJ IDEA
- Mount the shared directory
Open a project from the shared directory
I crossed out that last one because of the issue I alluded to earlier.
Arguably, I should have started by trying to mount the shared directory right after installation, but hindsight is 20/20. I could mount the share without issue by following the documentation:
mkdir $HOME/IdeaProjects
sudo mount -t 9p -o trans=virtio share $HOME/IdeaProjects -oversion=9p2000.L
Listing the contents of $HOME/IdeaProjects listed all my projects just as I
expected! With one exception, they were owned by 501:games. Obviously this was
a UID and GID mismatch between the host and the guest. The documentation
suggested I should be able to run sudo chown -R $USER $HOME/IdeaProjects, but
this led to a permission denied error for every file and directory. A quick
search showed that this was not an isolated issue which led others to use the
SPICE agent with WebDAV over the default of VirtFS and the 9p filesystem.
At this point I realized that my CPU fan had been running on high the entire time the VM had been up. I had also noticed that the system did have some delayed response times, especially when moving windows. I opted to shut down the VM and try AVF; perhaps the purported performance improvement would be a reality.
Once more, with feeling
For my second attempt I made one change to the specs: I checked the box next to “Use Apple Virtualization”. That’s the only change required to use AVF. UTM takes care of everything else under the hood.
I noticed one difference immediately. On the QEMU system, it opened in a smaller window when I started the VM, regardless of what settings I had set before I closed it. This time the window opened much larger, taking up most of my desktop. The default resolution was also higher.
Installation completed the same as before. I noticed while waiting for installation to complete that the pause button for the VM was available. It had been grayed out on the last attempt.
After installation, I removed the ISO device, started the machine, and proceeded to repeat the steps I followed the first time around. The CPU fan started up when I launched the VM, but died down shortly after and I didn’t notice any delays like I had before.
When it came time to mount the shared drive, I had to pass different parameters to the command:
mkdir $HOME/IdeaProjects
sudo mount -t virtiofs share $HOME/IdeaProjects
This worked without issue and once again listing the contents shows the projects I expected. This time, however, the content was all owned by the current user!
I went on to open a project in IDEA, a simple Rails app. The project opened and indexed as normal. The indexing process didn’t appear to take any longer than usual, which would have pointed to a disk performance hit from directory sharing.

A word about Wayland
Fedora 37 KDE uses the Wayland window system by default. Wayland is a replacement for X11, but as it’s a different protocol there’s bound to be compatibility issues. One such is copy and paste between host and guest.
There is currently an open bug with Fedora to address this issue, but it may affect other distros as well. For now, if you need clipboard sharing and you run into issues with Wayland, you can use X11 instead. On Fedora KDE, X11 is installed by default and you can switch to it from the login screen.
Next: Trying out multiple displays.
One of the biggest issues I’ve run into in the past with virtualization on the desktop is getting it to work with multiple displays. I usually work with three displays (two external monitors and my Macbook display), so multiple monitor support is important.
That’s for another time though. UTM seems to have potential, but only time will tell if this could be a path to Linux as my daily driver once again.
